
How to Prep Walls for Peel-and-Stick Wallpaper
Wallpaper guides · Surface preparation
The part you do before opening a roll can decide how smoothly the project goes. Use this guide to inspect the wall, record what needs attention, and prepare questions for the wallpaper supplier.
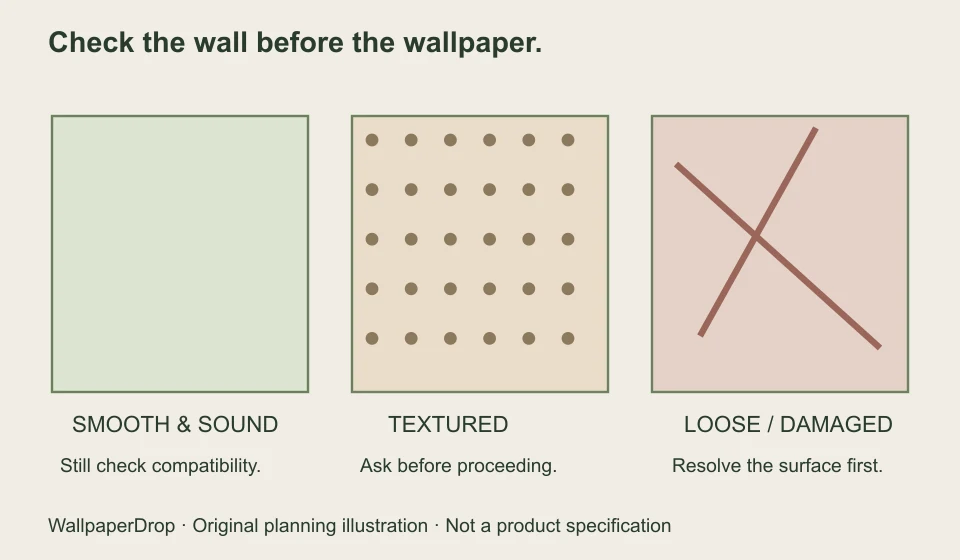
Inspect the wall before deciding how to clean it.
Look across the wall in side light, then inspect the areas near trim and previous picture hooks. You are trying to identify the surface you actually have, including old paper, visible texture, loose paint, cracks, dust or dampness. Do not cover a problem just because the new wallpaper would hide it.
A texture that looks subtle from the doorway may still affect contact between the surface and an adhesive-backed sheet. An existing wallpaper layer creates another unknown: the new covering depends on the old layer staying attached. Ask whether that substrate is approved before continuing.
If you find persistent dampness, unstable paint or a surface you cannot identify, pause and resolve the cause or obtain appropriate professional advice. This guide does not prescribe sanding, stripping, or treatment of an unknown old coating.
Dry to the touch is not the same as fully cured.
Find the paint’s name and finish if you can, and check its curing instructions. Then check what the wallpaper manufacturer requires for that paint and surface. Do not substitute a universal waiting period for those two sets of instructions.
Check the approved paint finish and surface requirements in the instructions supplied with your chosen wallpaper. Follow the paint manufacturer’s curing directions as well. A finish that suits one material may not suit another; “removable” does not mean suitable for every painted wall.
Clean, repair, and let the surface reach the required condition.
Use the cleaning method specified or approved for the chosen wallpaper and paint. A solvent or cleaner recommended for one combination is not automatically appropriate for another. If instructions disagree or the cleaner could affect the coating, ask before using it and check an inconspicuous area as directed.
Deal with holes and damaged areas using a suitable repair process for that wall. Any repaired, primed or repainted area introduces its own drying or curing requirement. The aim is an even, sound surface; wallpaper should not be asked to hold a loose coating together.
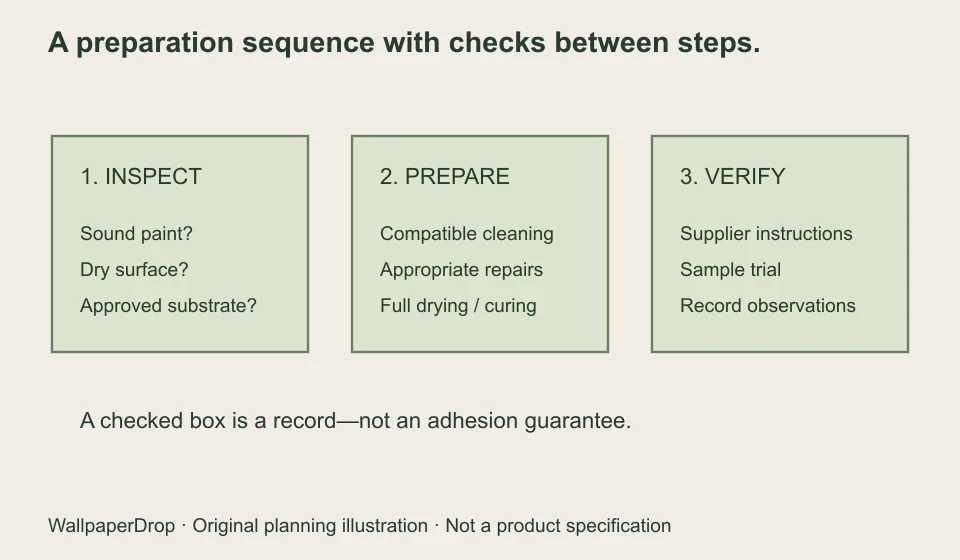
Use the checklist to find the missing information.
Check an item only when you have verified it. An unchecked item does not diagnose your wall; it identifies a question to resolve. Even a complete list is not an adhesion guarantee.
Wall readiness: record what you know
Checks recorded: none yet.
Give the sample trial a record, not just a thumbs-up.
Use a sample of the actual material—not a different wallpaper that happens to look similar. Follow the supplier’s placement, observation and removal directions. Record the paint, surface condition, cleaning method, trial start and check dates, and what happened to the edges or coating.
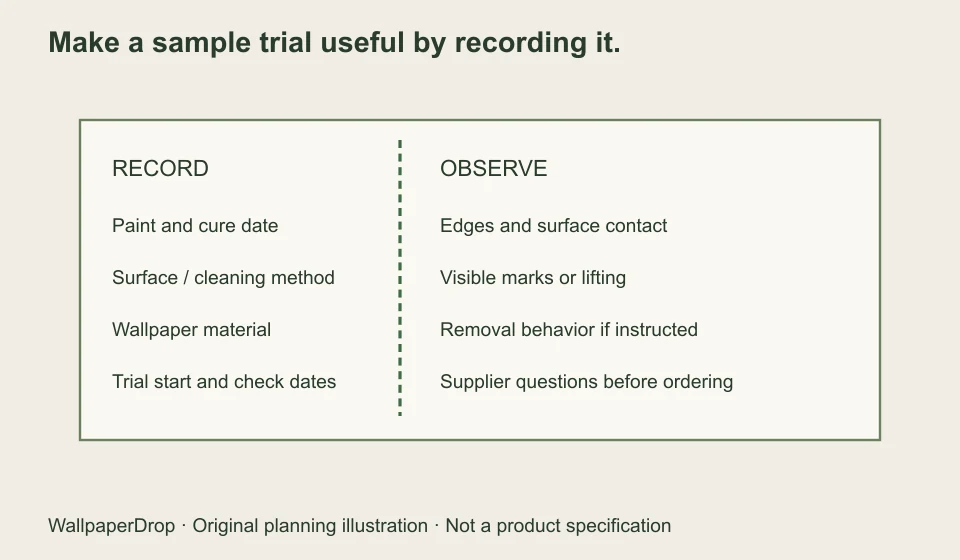
Take clear close-up photographs if something lifts or marks the paint, and share the record with the supplier before ordering. Do not describe a few hours of contact as a long-term durability test. Conditions elsewhere on the wall may differ, especially near heat, moisture or repairs.
Questions worth asking before you proceed
- Is this exact wallpaper compatible with my substrate and paint finish?
- Is my surface texture approved, or does the wall need another treatment?
- What cleaning and curing conditions do you require?
- How should I carry out and evaluate a sample trial?
- What is the correct seam, removal and care method for this material?
Save the answers with your order details. They are more useful than a generic promise that peel-and-stick wallpaper is always easy or always damage-free.
Check your chosen material
WallpaperDrop offers different application methods. Compare the material options and read the instructions for the exact product you select. For our peel-and-stick option, check the self-adhesive fabric requirements rather than assuming instructions for another brand’s vinyl apply.
Choosing between application methods? Compare peel-and-stick, pre-pasted and paste-the-wall workflows before deciding which instructions apply to your project.